Your beautiful printed t-shirts need to stay fresh always and it is a great deal to always follow the right process in ironing your shirts. Your statement-designed t-shirt, your beautiful vintage top with your favorite rapper or singer, the beautiful sunflower on the black shirt, and your nice tee with your favorite quote can be maintained and won for a long time if you do the ironing right. These beautiful designs on t-shirts are our everyday choice for almost all occasions and events.
We understand the hurdles and setbacks you encountered in the past in your quest to have a neatly ironed t-shirt. You ironed your dress and got it burnt, you mistakenly ironed the printed designs and got it ruined, and you have not been able to get rid of all the wrinkles on the shirts as a result of the wrong temperature.
We are here to provide some handy and easy tips that will help you live a happy-ironing life.
The best ways to iron your printed t-shirts are; to use a steam iron with a working regulator, read the care label, use an iron board, make sure the dress and iron are free from dirt or stains, turn the shirts inside out before ironing, allow the ya t-shirt to cool before wearing.
What you need to have:
- Iron
- Ironing board
- Cotton cloth
- Spray starch or spray bottle with water
- Direct source of electricity
Here is the detailed process for ironing the printed t-shirts.
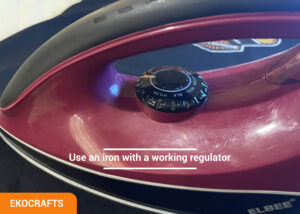
1. Use an iron with a working regulator
You do not want to have any situation where you cannot increase or decrease the temperature of the iron. Using an iron with a working regulator is important in achieving the best results. Steam iron is an ideal choice capable of removing any tough wrinkles. Steam iron is a household electrical appliance that is best for removing wrinkles on garments by using heat and steam. The use of steam makes it easy to get rid of the wrinkles as the steam relaxes the fabric and also makes it soft. In a situation where you do not have a steam iron, you can rely on other effective household iron that is in good shape. 
Key Features of a Steam Iron:
- Water Reservoir Tank: This is where you fill water to generate steam. It’s typically transparent so you can see when it needs refilling.
- Steam Burst Button: Most steam irons have a steam burst feature that releases a powerful blast of steam for stubborn wrinkles.
- Spray Mist Function: A spray mist button lightly dampens the fabric with water to help remove wrinkles from the dry fabric before pressing.
- Adjustable Temperature: You can set the temperature based on the type of fabric. Delicate fabrics need lower temperatures, while heavy fabrics like cotton or linen require higher temperatures before one can get rid of wrinkles.
- Anti-Drip System: Prevents water from dripping from the iron when it’s at lower temperatures.
- Self-Cleaning: Some steam irons have a self-cleaning function to prevent mineral deposits from clogging the steam vents.
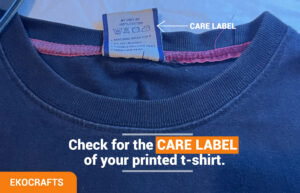
2. Check for the care label of your printed t-shirt.
The care label on a printed shirt provides age instructions on how to iron your printed t-shirts. Read the car label carefully and understand how the dress should be ironed. Do not try to experiment with the temperature of the iron with the printed t-shirts as too much can burn the shirts or cause the design to be repainted on the back. To be on the safer side, gently place a sheet of paper in the middle of the shirts.

3. Put the ironing board in position.
Position your ironing board at a comfortable and also close to the main socket. This allows you to have enough space to iron your printed t-shirts. Also, you need to make sure that, the cable of the iron doesn’t entangle around the table or your body as this may cause you to fall or cause an electric shock if the cable is faulty.
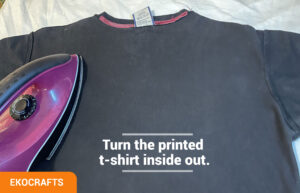
4. Turn the printed t-shirt inside out.
Turning the printed t-shirt inside out is crucial in achieving a good-looking design that maintains its quality over a long period. Turning the dress inside out protects the design from direct exposure to high temperatures. The inside part of the t-shirt acts as a shield that protects your delicate designs.

Follow these steps to achieve the best results;
- Pre-remove wrinkles by first of all using your palm to straighten any part of your t-shirt that has wrinkles. Doing this also allows you to straighten any part of the dress that did not turn right.
- Plug the iron into the socket, turn it on, and make sure the ironing surface does not touch the t-shirt while you set up.
- You can sprinkle some water or use spray starch and spray on the entire shirt. This makes the ironing process easy and simple.
- Set the required temperature as indicated on the care label, gently start by ironing the arm of the T-shirt in a circular motion and move to the chest area to the neck, and finally to the lower region of the T-shirt. Repeat this process to remove any part that still has wrinkles
- Turn the shirt and proceed to iron by following the same process as stated in the above point.
- Watch out for any wrinkles and gently iron it off.
- Allow the printed t-shirt to cool and proceed to hang it on a hanger or wear it for your event.
Essential Tips to Note:
- In case you have a more delicate print on the shirt, consider lowering the level of heat from the iron by regulating it to avoid the transfer of excessive heat from the inner part of the shirt to the printed surface area shirt.
- Avoid ironing the print area directly, as it can cause damage.
