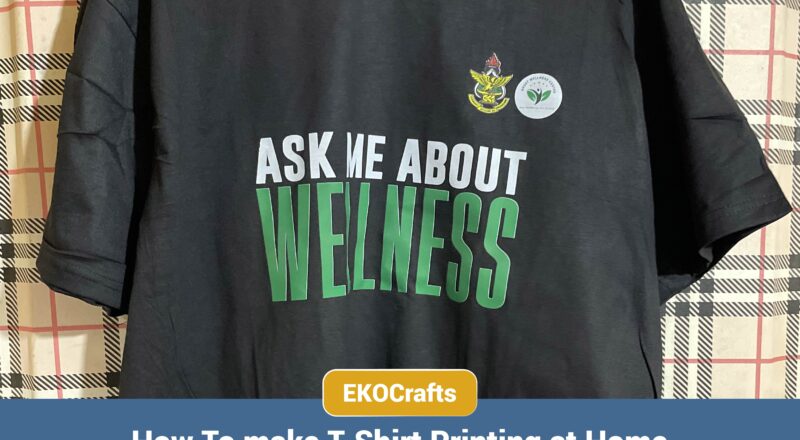
Creating t-shirts at home is now more fun and easier than ever, thanks to the easy methods being introduced online. Some methods may be costly, and others may be less expensive, depending on what you want.
This article will delve deep into How To Make T Shirt Printing at Home.
Materials Needed for T-Shirt Printing
To print a shirt at home, you will need;
- T-Shirts (plain t-shirt)
- Ink or fabric paint
- Iron
- Teflon sheet
- Squeegee
- Heatpress
- Screen Printing Frame
Types of T-Shirt Printing At Home
Have you been wondering how to print t-shirts at home? These are some of the easiest methods.
1. DTF Prints
Whether you are starting a small business or a homemade craft, DTF is. Versatile and accessible printing method that can help you achieve impressive results.
DTF which simply means Direct-To-Film is a textile printing approach where designs are printed or transferred on a Polythenelene Terephthalate) film. An adhesive powder is applied to the printed design so it sticks to the T-shirt permanently afterward.
How DTF Printing Works
Here is a step-by-step method for the DTF Printing
Design Creation: First you need to make your unique designs using software such as Adobe Illustrator, Photoshop, etc. Alternatively, if you are not a graphic designer you can use Canvas to get a free t-shirt design or hire the services of a designer.
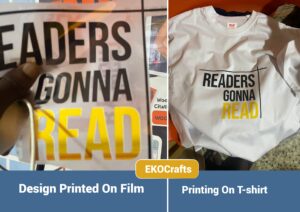
Print on Film: After you are done with the design, visit any printing press and print out the design on a film (Polythenelene Terephthalate). Unlike other printing methods, DTF uses CMYK colors with the addition of white ink as a backing layer to make the color pop on dark fabrics. In this case, we printed “Readers Gonna Read” on a film and it has been illustrated in the above picture.
Applying Powder Adhesive: For the design to stick permanently on the t-shirt, it is essential that a heat-sensitive adhesive powder is applied to the wet powder to make it durable on printed shirts. This ensures that the design sticks permanently on the shirt.
Curing: It is essential for drying the coated film which has the adhesive powder with a heat press or source of heat not exceeding 200 degrees Celsius for about a minute.
Transfer to Fabric: At this stage, kindly ensure that the film is cured or dried by testing with your hand. If your hands get stained with the ink then it is an indication that the ink is not properly dried. You will transfer the design onto a plain T-shirt if the film is properly dried by applying pressure and heat to help transfer the design from the film to the garment. Afterward, gently peel the film from the design. As illustrated above, we printed the final film on a t-shirt.
The Importance/Reasons of Choosing DTF Prints
- It is easy to print on a variety of materials such as leather, fabric, and plastics.
- DTF prints are of high quality; the quality is maintained after several washes maintaining a long-lasting finish.
- It is essential for printing complex designs that have a variety of colors, unlike traditional methods like screen printing.
- It is cost-effective and saves time and energy.
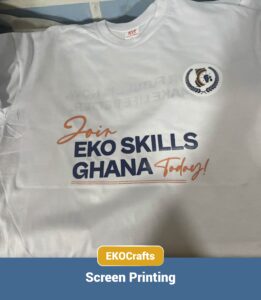
2. Screen Printing
Screen Printing is the oldest and most traditional method used for transferring designs onto garments. It is also known as silk screening or serigraphy. Unlike DTF printing, screen printing uses inks to print individual colors onto garments; making it quite expensive.
How Screen Printing Works
Here is a step-by-step method for screen Printing
Design Creation: Using the same approach as the DTF printing, one must first design what he/she wants to print using Graphic design software like Adobe Illustrator, etc.
Screen Preparations: The screen that would be used for the t-shirt printing should be coated with a light-sensitive emulsion and exposed to light while keeping the design over it. The surroundings that do not have the design covered become hardened which creates a stencil.
Printing and Design: Once the stencil is fully prepared and ready, the screen is positioned below the garment or the material to be printed on. Make sure the screen is properly adjusted on the garment. Use a squeegee to push the design on the ink onto the garment. After printing, you need to cure the ink so that the ink stays forever on the shirt. You can use a heat press or an iron to do the heating.
Advantages of Screen Printing
- Screen printings tend to be long-lasting and resistant to wear.
- Screen printing allows for thick layers of ink, leading to vibrant, opaque colors.
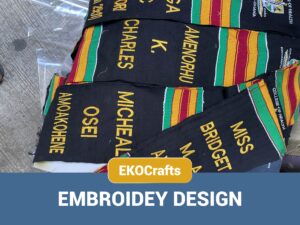
3. Embroidery
Embroidery is a creative approach used in getting designs on shirts. It involves the ability to directly stitch thread onto a shirt to create a design or pattern. These designs or patterns are stitched on materials such as cotton or leather.
Embroidery is mostly done using an embroidery machine that uses a needle to create patterns on materials such as t-shirts or leather. For home embroidery works, you can use a basic embroidery hook to hold the fabric in place while you stitch by hand one pattern at a time using a freehand design.
Advantages of Embroidery
- They are unique and can withstand intense pressure. Stitches can stay in touch without peeling off.
- Embroidery can be printed on various materials such as delicate silk, and heavy materials such as leather.
- embroidery is a popular choice for branding logos, monograms corporate bodies.
- In professional institutions, embroidery is highly preferred to other forms of printing such as DTF and screen printing.